
Planting
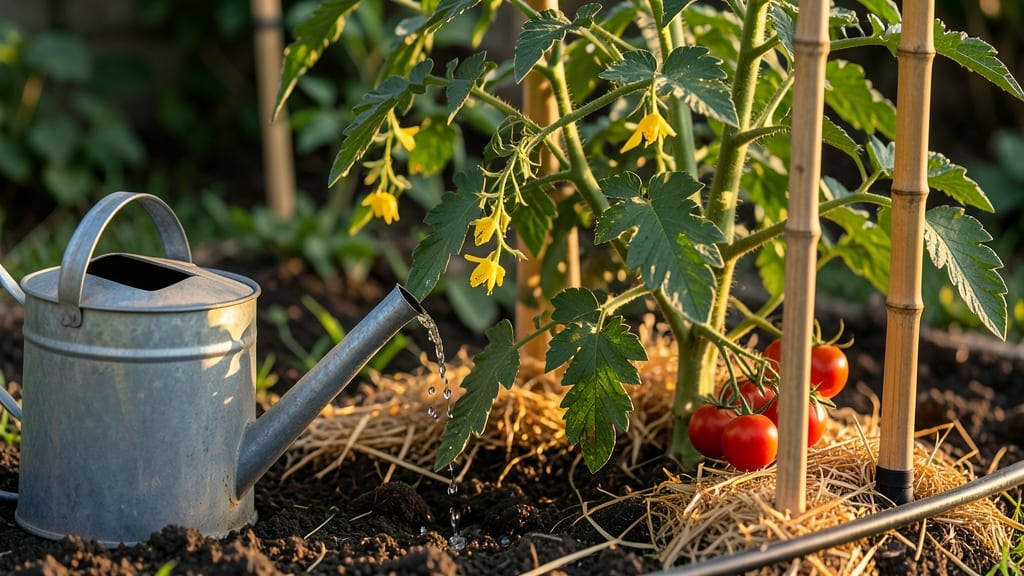
You’ll need basic supplies: a soaker hose or drip tape, a timer, connectors, and a water source. The setup takes about 30 minutes and works for both container-grown and in-ground tomatoes.
For hot climates, I add a shade cloth to prevent evaporation, while cooler zones benefit from a mulch layer to retain moisture. The key is adjusting the flow rate so the soil stays damp but never soggy—tomatoes hate "wet feet" just as much as they love steady hydration.
By mid-summer, you’ll notice fewer blossom-end rot spots and plants that keep producing without stress. The system also cuts water use by 30-50% compared to overhead sprinklers, which means lower bills and happier plants.
Plus, no more lugging hoses around—just set it, forget it, and watch your tomatoes thrive with minimal effort.
Works for cherry, beefsteak, or paste tomatoes alike, and adapts easily to raised beds or hanging baskets. Whether you’re a first-time gardener or a seasoned grower, this method takes the guesswork out of watering. Let’s get your tomatoes growing like never before!
📚 In This Guide
- What you need
- Instructions
- Tips and common mistakes
- Wrapping up and next steps
What you need
- ● Drip irrigation tubing – ½-inch or ¼-inch poly tubing, 25–50 ft (depending on garden size). Tip: Opt for soaker hose for larger beds!
- ● Emitters – 1–2 emitters per tomato plant, delivering 0.5–1.5 GPH (gallons per hour). Pro tip: Adjustable emitters work best for customization!
- ● Timer or solenoid valve – Automatic shutoff (e.g., Orbit B-Hyve or Rain Bird) to schedule watering.
- ● Backflow preventer – Essential to protect your system from contamination.
- ● Connectors & fittings – T-connectors, end caps, and tubing connectors (match tubing size).
- ● Water source adapter – Hose bibb or pressure regulator (if using a spigot).
- ● Measuring tape & scissors – For precise tubing cuts.
- ● Stakes or clips – To secure tubing near plants.
- ● Filtration system – Prevents clogs from debris (e.g., mesh screen filters).
- ● Fertigation kit – Adds liquid fertilizer directly to the water stream.
- ● Battery-powered timer – For off-grid or remote garden setups.
- ● Pressure-compensating tubing – Ensures even water flow on sloped gardens.
- ● Moisture sensors – Smart alerts for when plants need water (e.g., Rachio or Arduino-based systems).
Step-by-Step guide to building a self-regulating drip system for tomatoes
Here's how to create a foolproof watering system that delivers consistent moisture without the guesswork.
💧 Step 1: Plan Your System Layout for Even Coverage
Start by sketching your tomato bed layout, marking where each 4-foot vine will occupy space. For 4 plants, you'll need 4 main emitters placed at the base of each plant, with an additional 2-3 emitters per plant spaced along the main stem for upward growth. This creates a "tree-like" watering pattern that follows the plant's development.
Use a garden hose to trace your layout in the soil—this helps visualize water flow before installation. The goal is to place emitters where roots will develop most heavily: at the base, mid-stem, and near the growing tips. I always add one extra emitter at the farthest reach of each vine's expected growth zone, since tomatoes can sprawl unpredictably.
🪴 Step 2: Assemble the Drip Tape and Emitters
Lay out your ¼-inch drip tape along the traced paths, securing it with staples or landscape pins every 12 inches to prevent shifting. Poke small holes in the tape at each emitter location using a utility knife—these should be just large enough to insert the emitter's barb without tearing the tape.
Insert the 0.5 GPH emitters at each marked point, pressing firmly until they click into place. For upward growth, use spaghetti tubing to extend emitters vertically along the main stem, securing with zip ties every 18 inches. This ensures water reaches the top canopy without manual intervention, which is critical during hot afternoons when evaporation peaks.
⏰ Step 3: Connect to a Timer-Controlled Water Source
Attach the drip tape to your ½-inch mainline tubing using ¼-inch to ½-inch reducers and barbed connectors. Run the mainline to your water source, then install a pressure regulator set to 15-20 PSI—this prevents emitter blowouts and ensures even flow. The key here is the timer: set it for 30 minutes every other day during peak growth (June-August) and reduce to 20 minutes every 3 days in cooler months.
I always test the system before planting by running water through it for 10 minutes and checking for even saturation. Look for 1-2 inches of moist soil around each emitter zone—this confirms proper coverage. Adjust emitter spacing if you see dry spots, as tomatoes need consistent moisture to prevent blossom-end rot.
🌿 Step 4: Install a Rain Sensor and Backflow Preventer
Wire the rain sensor in parallel with the timer so it automatically pauses watering when moisture is detected. Mount the sensor where it won't be shaded by plants—typically 12 inches above the soil and away from sprinkler overspray. This prevents overwatering during unexpected rain, which can suffocate roots and promote fungal diseases.
Attach the backflow preventer between the mainline and water source to comply with local codes and protect your plumbing. I also add a filter screen at the connection point to trap debris that could clog emitters. Run the system for 5 minutes daily during the off-season to flush out any sediment buildup—this keeps the system reliable year-round.
☀️ Step 5: Monitor and Adjust for Seasonal Changes
Check the system weekly during summer to ensure emitters aren't clogged or displaced by plant growth. Tomatoes transpire heavily in 80-90°F heat, so you may need to increase runtime to 45 minutes every other day if the soil feels dry 1 inch below the surface. In contrast, reduce watering to 15 minutes every 4 days when temperatures drop below 70°F, as cooler air reduces evaporation.
Watch for signs of overwatering—yellowing lower leaves or mushrooms growing in the soil—and adjust the timer accordingly. The system should deliver 1-1.5 gallons per plant daily during peak growth; any deviation means recalibrating your emitters or runtime. Real talk: I once had a system run wild and drowned my plants until I installed a flow meter to track actual output.
Tips & tricks for perfect tomato plant watering systems
A few strategic adjustments can transform your drip irrigation from functional to flawless. These are the details that make all the difference between healthy vines and stressed plants.
Emitter Placement Precision: In Step 1, when sketching your layout, remember that tomato roots follow water—place your extra emitters where you expect the plant to sprawl most aggressively. I've found that adding one emitter at the farthest expected vine tip (about 3 feet beyond current growth) prevents dry spots later in the season. For upward growth, use spaghetti tubing to create a "water ladder" along the main stem, securing it every 18 inches as specified. This ensures water reaches the top canopy during peak evaporation periods (80-90°F heat).
Pressure Regulation Matters: The 15-20 PSI range in Step 3 isn't arbitrary—it's the sweet spot that prevents emitter blowouts while ensuring consistent flow. I recommend testing your pressure at the farthest emitter point, as friction loss in long runs can reduce pressure significantly. If you notice uneven watering, add a secondary regulator closer to the end of your mainline tubing. This becomes especially critical when you extend your system beyond 50 feet.
Seasonal Adjustment Strategy: The 45-minute runtime during extreme heat (Step 5) might seem excessive, but it accounts for both increased transpiration and evaporation losses. I've learned this the hard way—my first summer with tomatoes wilted because I stuck to the 30-minute schedule even when temps hit 95°F. For cooler months, the 15-minute every 4 days recommendation assumes soil moisture retention improves. To verify, check soil moisture 1 inch below the surface with your finger—if it's dry, extend the runtime by 5 minutes rather than increasing frequency.
Clog Prevention System: While the filter screen in Step 4 catches most debris, I've added an extra layer of protection by installing a 100-mesh screen at each emitter connection point. This prevents microscopic sediment from clogging the tiny emitter orifices. During the off-season maintenance (5 minutes daily), I also recommend flushing the system with a mild vinegar solution (1 part white vinegar to 4 parts water) to dissolve any mineral buildup that can occur over time.
Pro Tips for Tomato Plant Watering System
- A few strategic adjustments can transform your drip irrigation from functional to flawless. These are the details tha...
- Emitter Placement Precision: In Step 1, when sketching your layout, remember that tomato roots follow water—place you...
- Pressure Regulation Matters: The 15-20 PSI range in Step 3 isn't arbitrary—it's the sweet spot that prevents emitter ...
Frequently asked questions
Got questions about keeping your tomato plants happy with a self-regulating drip irrigation system? We’ve got answers! Here are some of the most common queries—plus quick fixes to keep your vines thriving.
How often should I water my tomato plants with a drip system?
A self-regulating drip system typically waters every 2–3 days in warm weather, but adjust based on soil dryness. Check the top inch of soil—if it’s dry, your system may need tweaking. Pro tip: Mulch around plants to retain moisture and reduce evaporation.
What’s the best time of day to run the drip irrigation?
Early morning (before 10 AM) is ideal—it minimizes evaporation and fungal risks. Avoid watering late in the day, as wet foliage can attract pests. If you’re using a timer, set it for short, frequent cycles (e.g., 10–15 minutes) rather than long soaks.
Why is my tomato plant wilting even with a drip system?
Wilting can signal clogged emitters, low water pressure, or root issues. First, check for blockages in the tubing or filters. If the soil feels bone-dry at the roots, your system may not be delivering enough water. Try adjusting the flow rate or adding a backup soaker hose temporarily.
Can I use a drip system for both seedlings and mature tomato plants?
Yes! Start seedlings with a gentle misting setup (like a fine-mist emitter) to avoid overwatering. Once transplanted, switch to standard drip emitters (1–2 gallons per hour). For mature plants, space emitters 12–18 inches apart along the plant’s base for even coverage.
Are there budget-friendly alternatives to a full drip system?
Try DIY soaker hoses (cut-and-drill PVC pipes) or wicking beds for containers. Even a simple bottle drip system (poke holes in a plastic bottle) works for small gardens. Just ensure consistent moisture—tomatoes hate dry spells!
How do I prevent overwatering with a drip system?
Overwatering often happens with poor drainage or excessive flow rates. Use a moisture sensor to monitor soil levels, and elevate beds if needed. For containers, ensure drainage holes are clear. Rule of thumb: Yellowing leaves = too much water; crispy edges = too little.
Wrapping up and next steps
Mastering a tomato plant watering system with self-regulating drip irrigation is your ticket to bountiful, healthy vines—without the guesswork! 🌱 By choosing the right materials, setting up a consistent flow, and troubleshooting common issues, you’ve already taken the first steps toward a thriving garden.
The key is patience and observation; your tomatoes will reward you with juicy, flavorful harvests all season long.
Ready to level up your gardening game? Start small—try this system with just a few plants, then expand as you gain confidence. Happy planting, and here’s to your green thumb success! 🌿